Loop Node
In this section, we'll explore the Loop Node, which functions similarly to for and while loops in programming languages, enabling repetitive execution of workflow segments.
Basic Loop Logic
Start by adding a Start Node to your workflow, then connect it to a Loop Node. Unlike other nodes, the Loop Node requires at least one child node to form its loop body. This body will execute repeatedly based on your loop configuration.
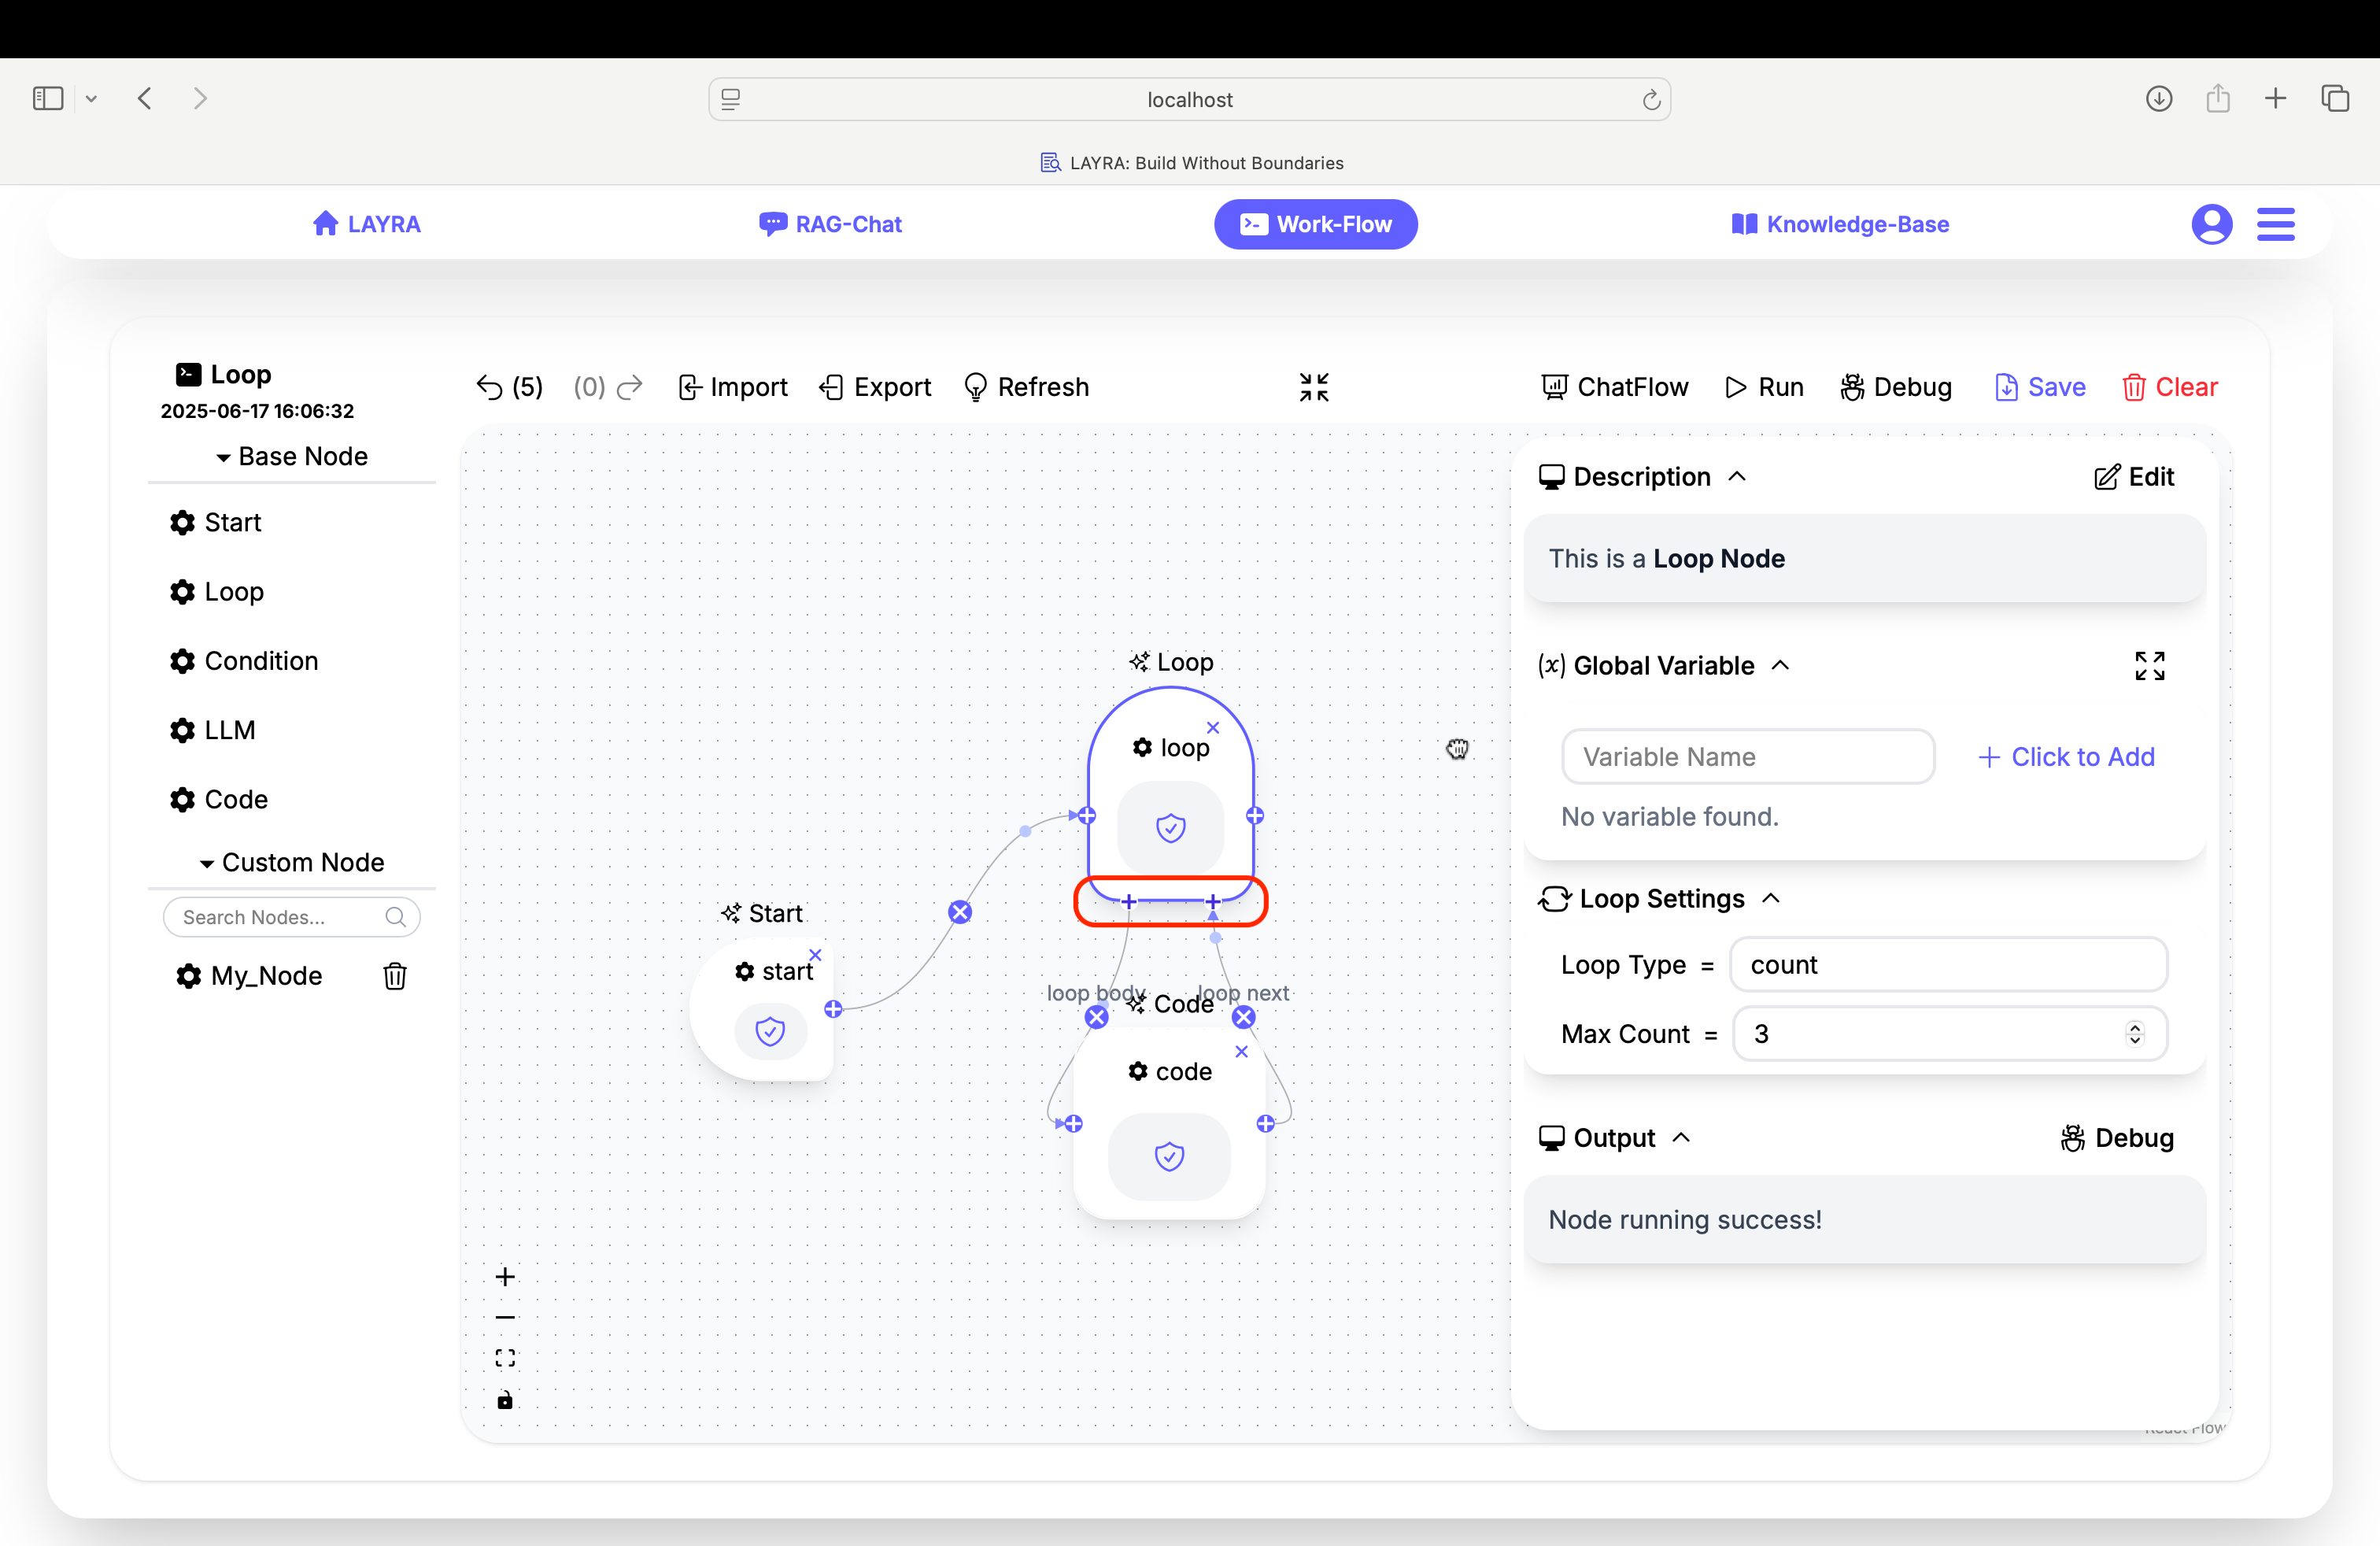
Select the Loop Node to reveal its configuration panel. You'll find the Loop Settings section with two loop types:
- Count Loop
Executes a fixed number of iterations - Condition Loop
Executes while a break condition remains false
Loop Nodes lack a Run Test button for node-level testing since they require a loop body to function meaningfully.
Count Loop Configuration
When selecting Count as your loop type:
- Set the Max Count field to determine iterations
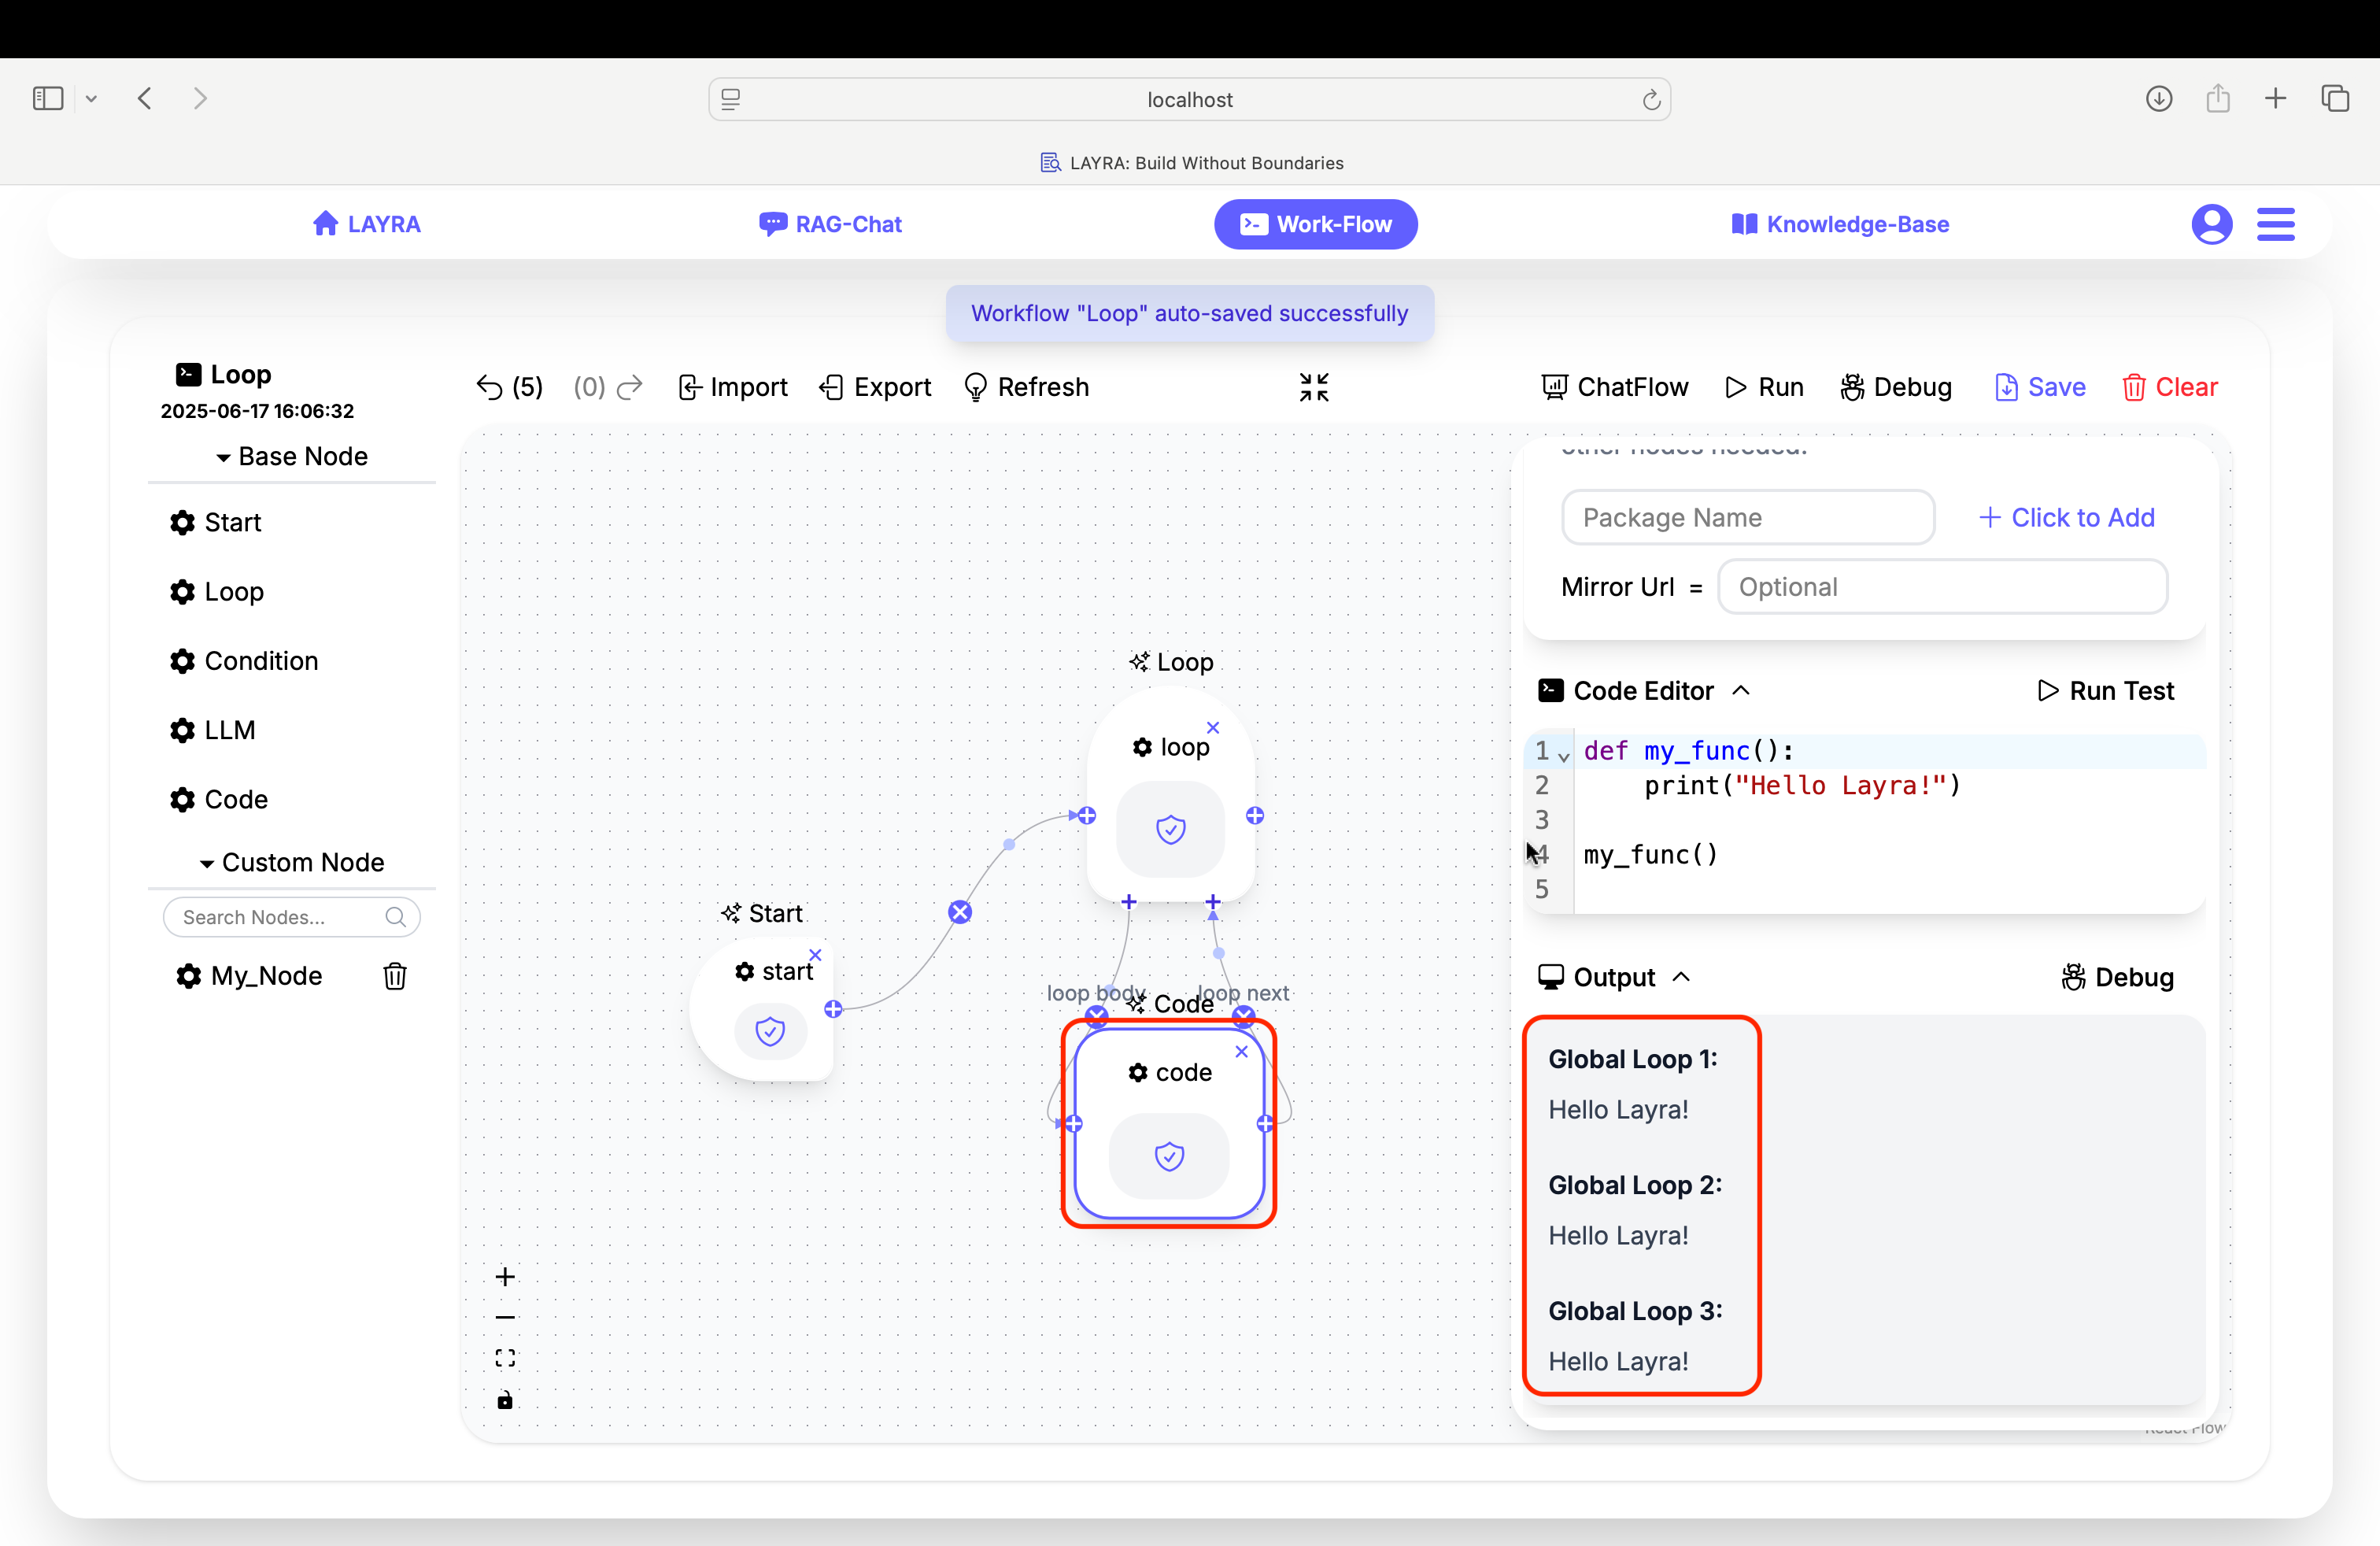
Example: Simple Counter
Max Count = 3
This configuration will execute the loop body exactly three times, with Global Loop values: 1, 2, 3.
Condition Loop Configuration
When selecting Condition as your loop type:
- Define your Break Condition using a Python expression
- The loop continues while this condition evaluates to
False - Breaks immediately when condition becomes
True
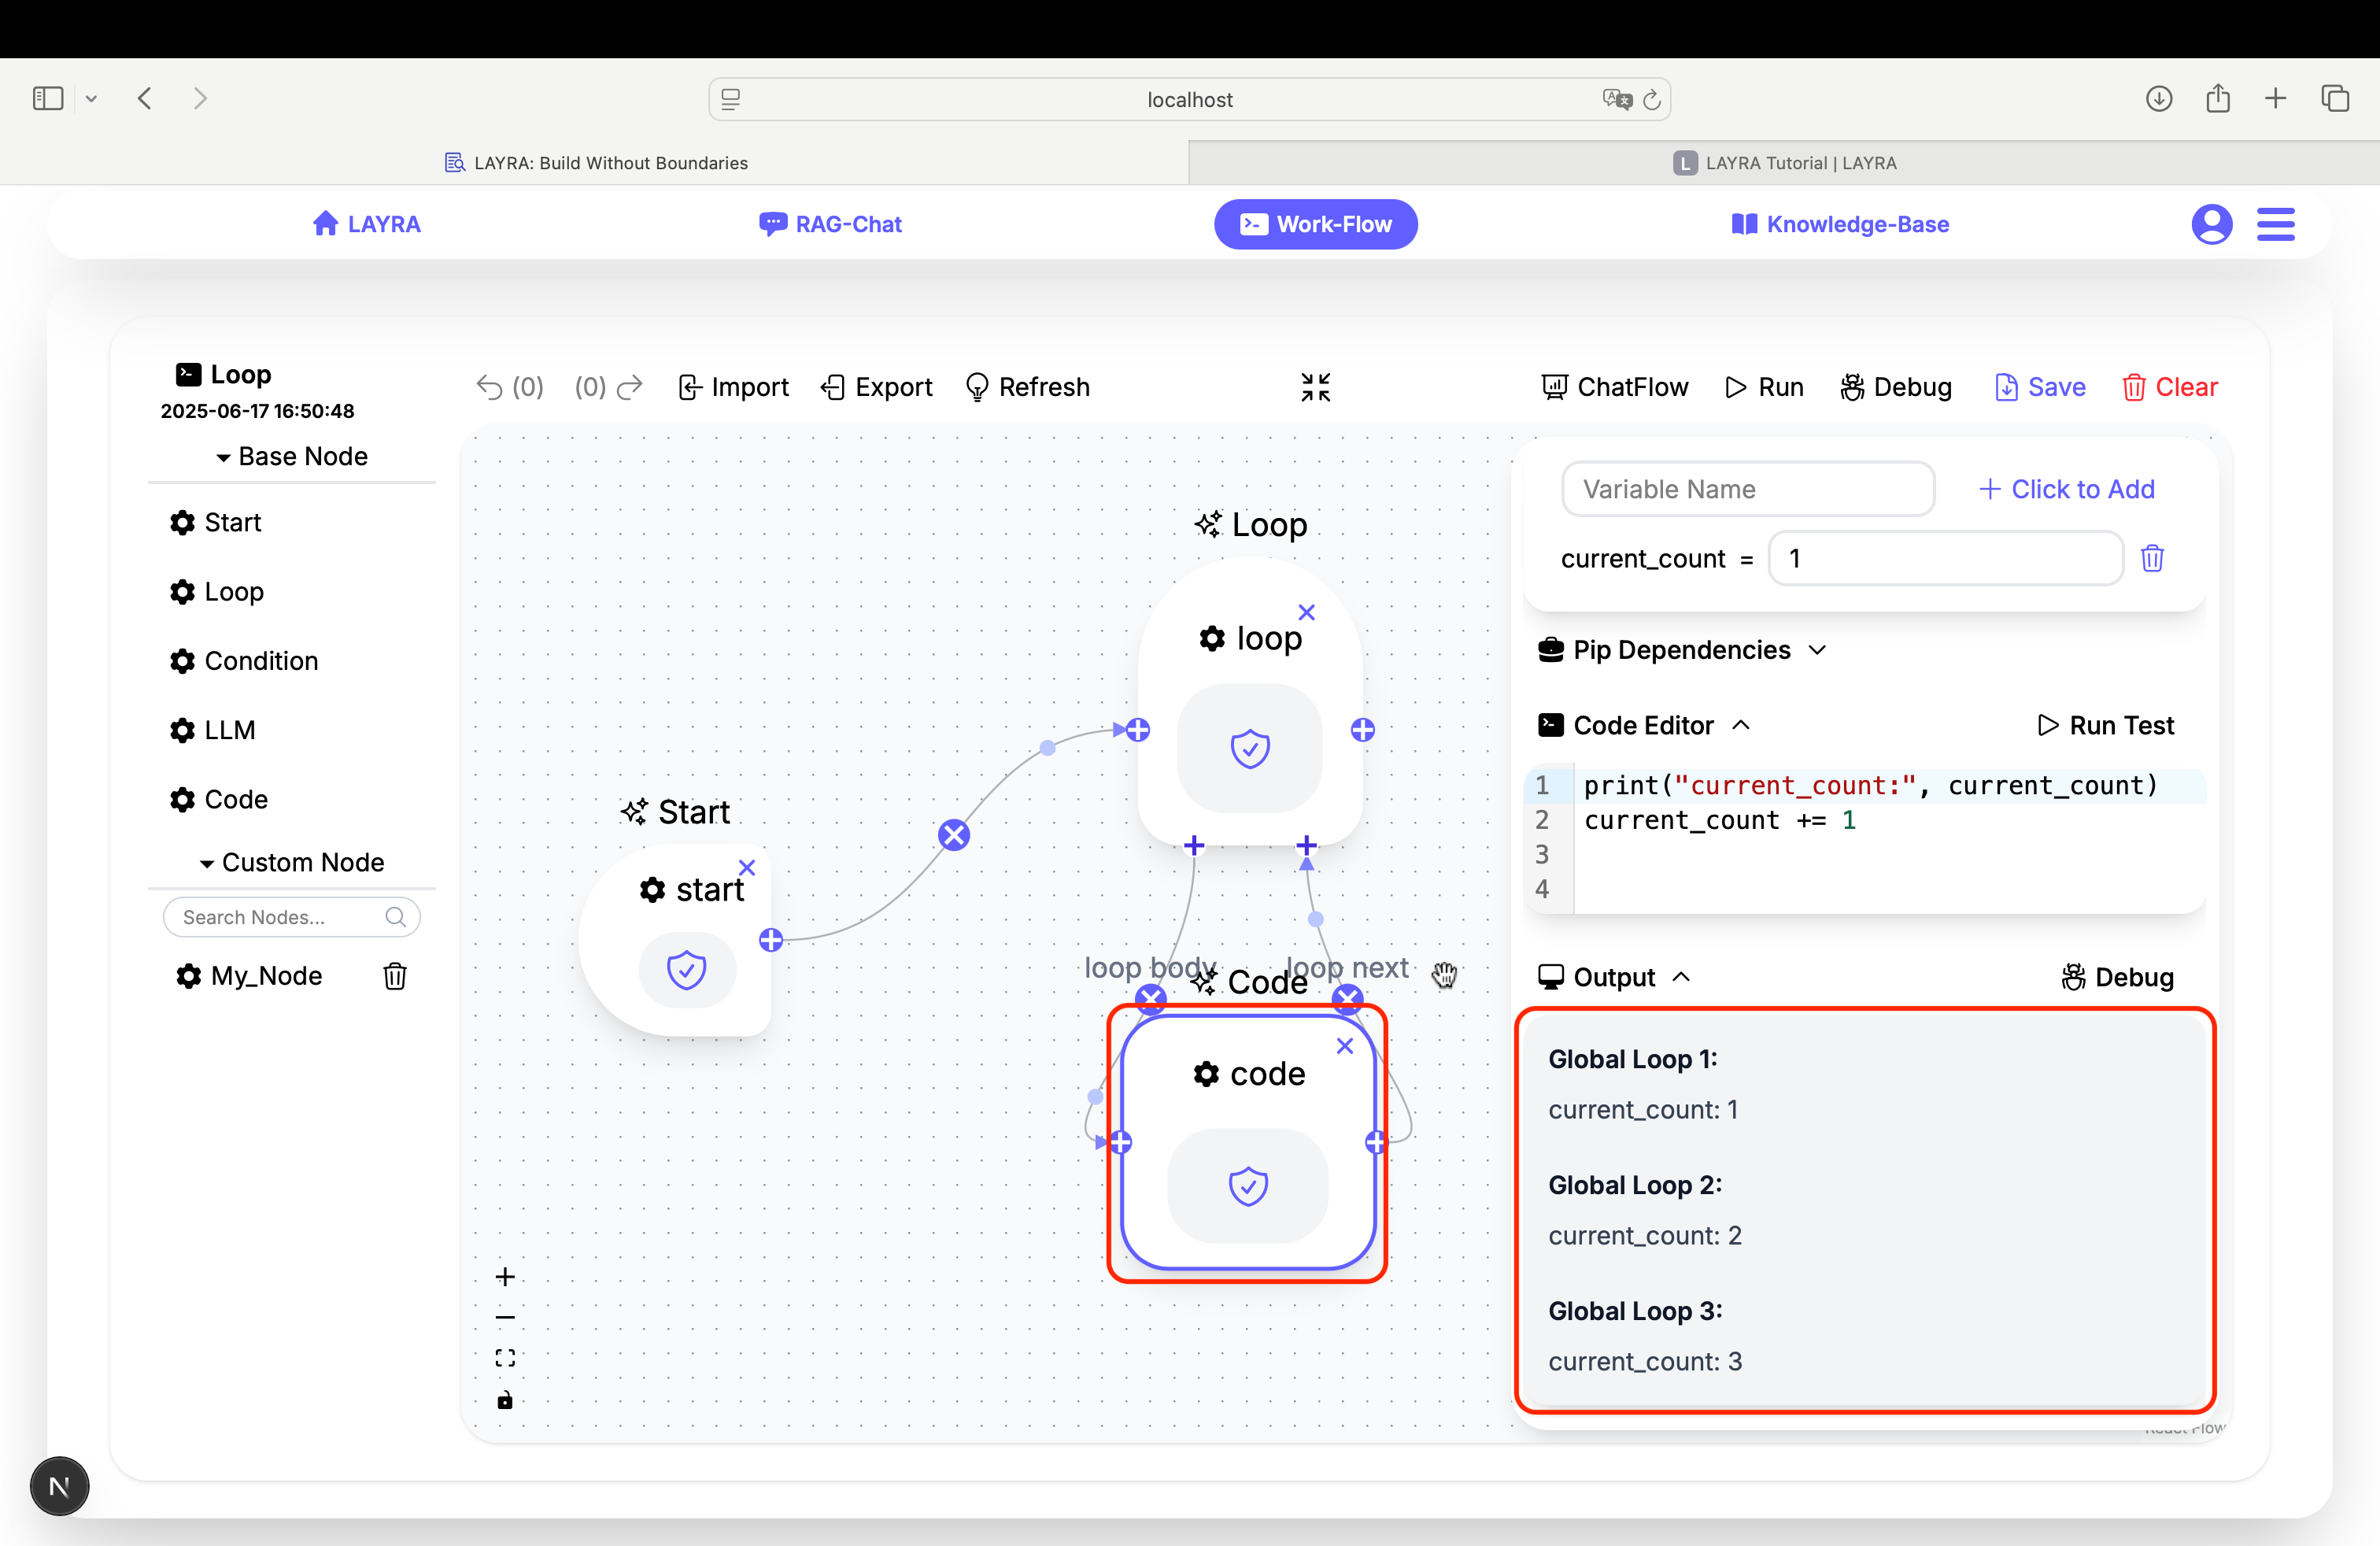
Example: Countdown Loop
# Global Variable
current_count = 1

# Break Condition
current_count > 3

# Code Editor
print("current_count:", current_count)
current_count += 1
The loop will execute while current_count <= 3, stopping when it reaches 4.
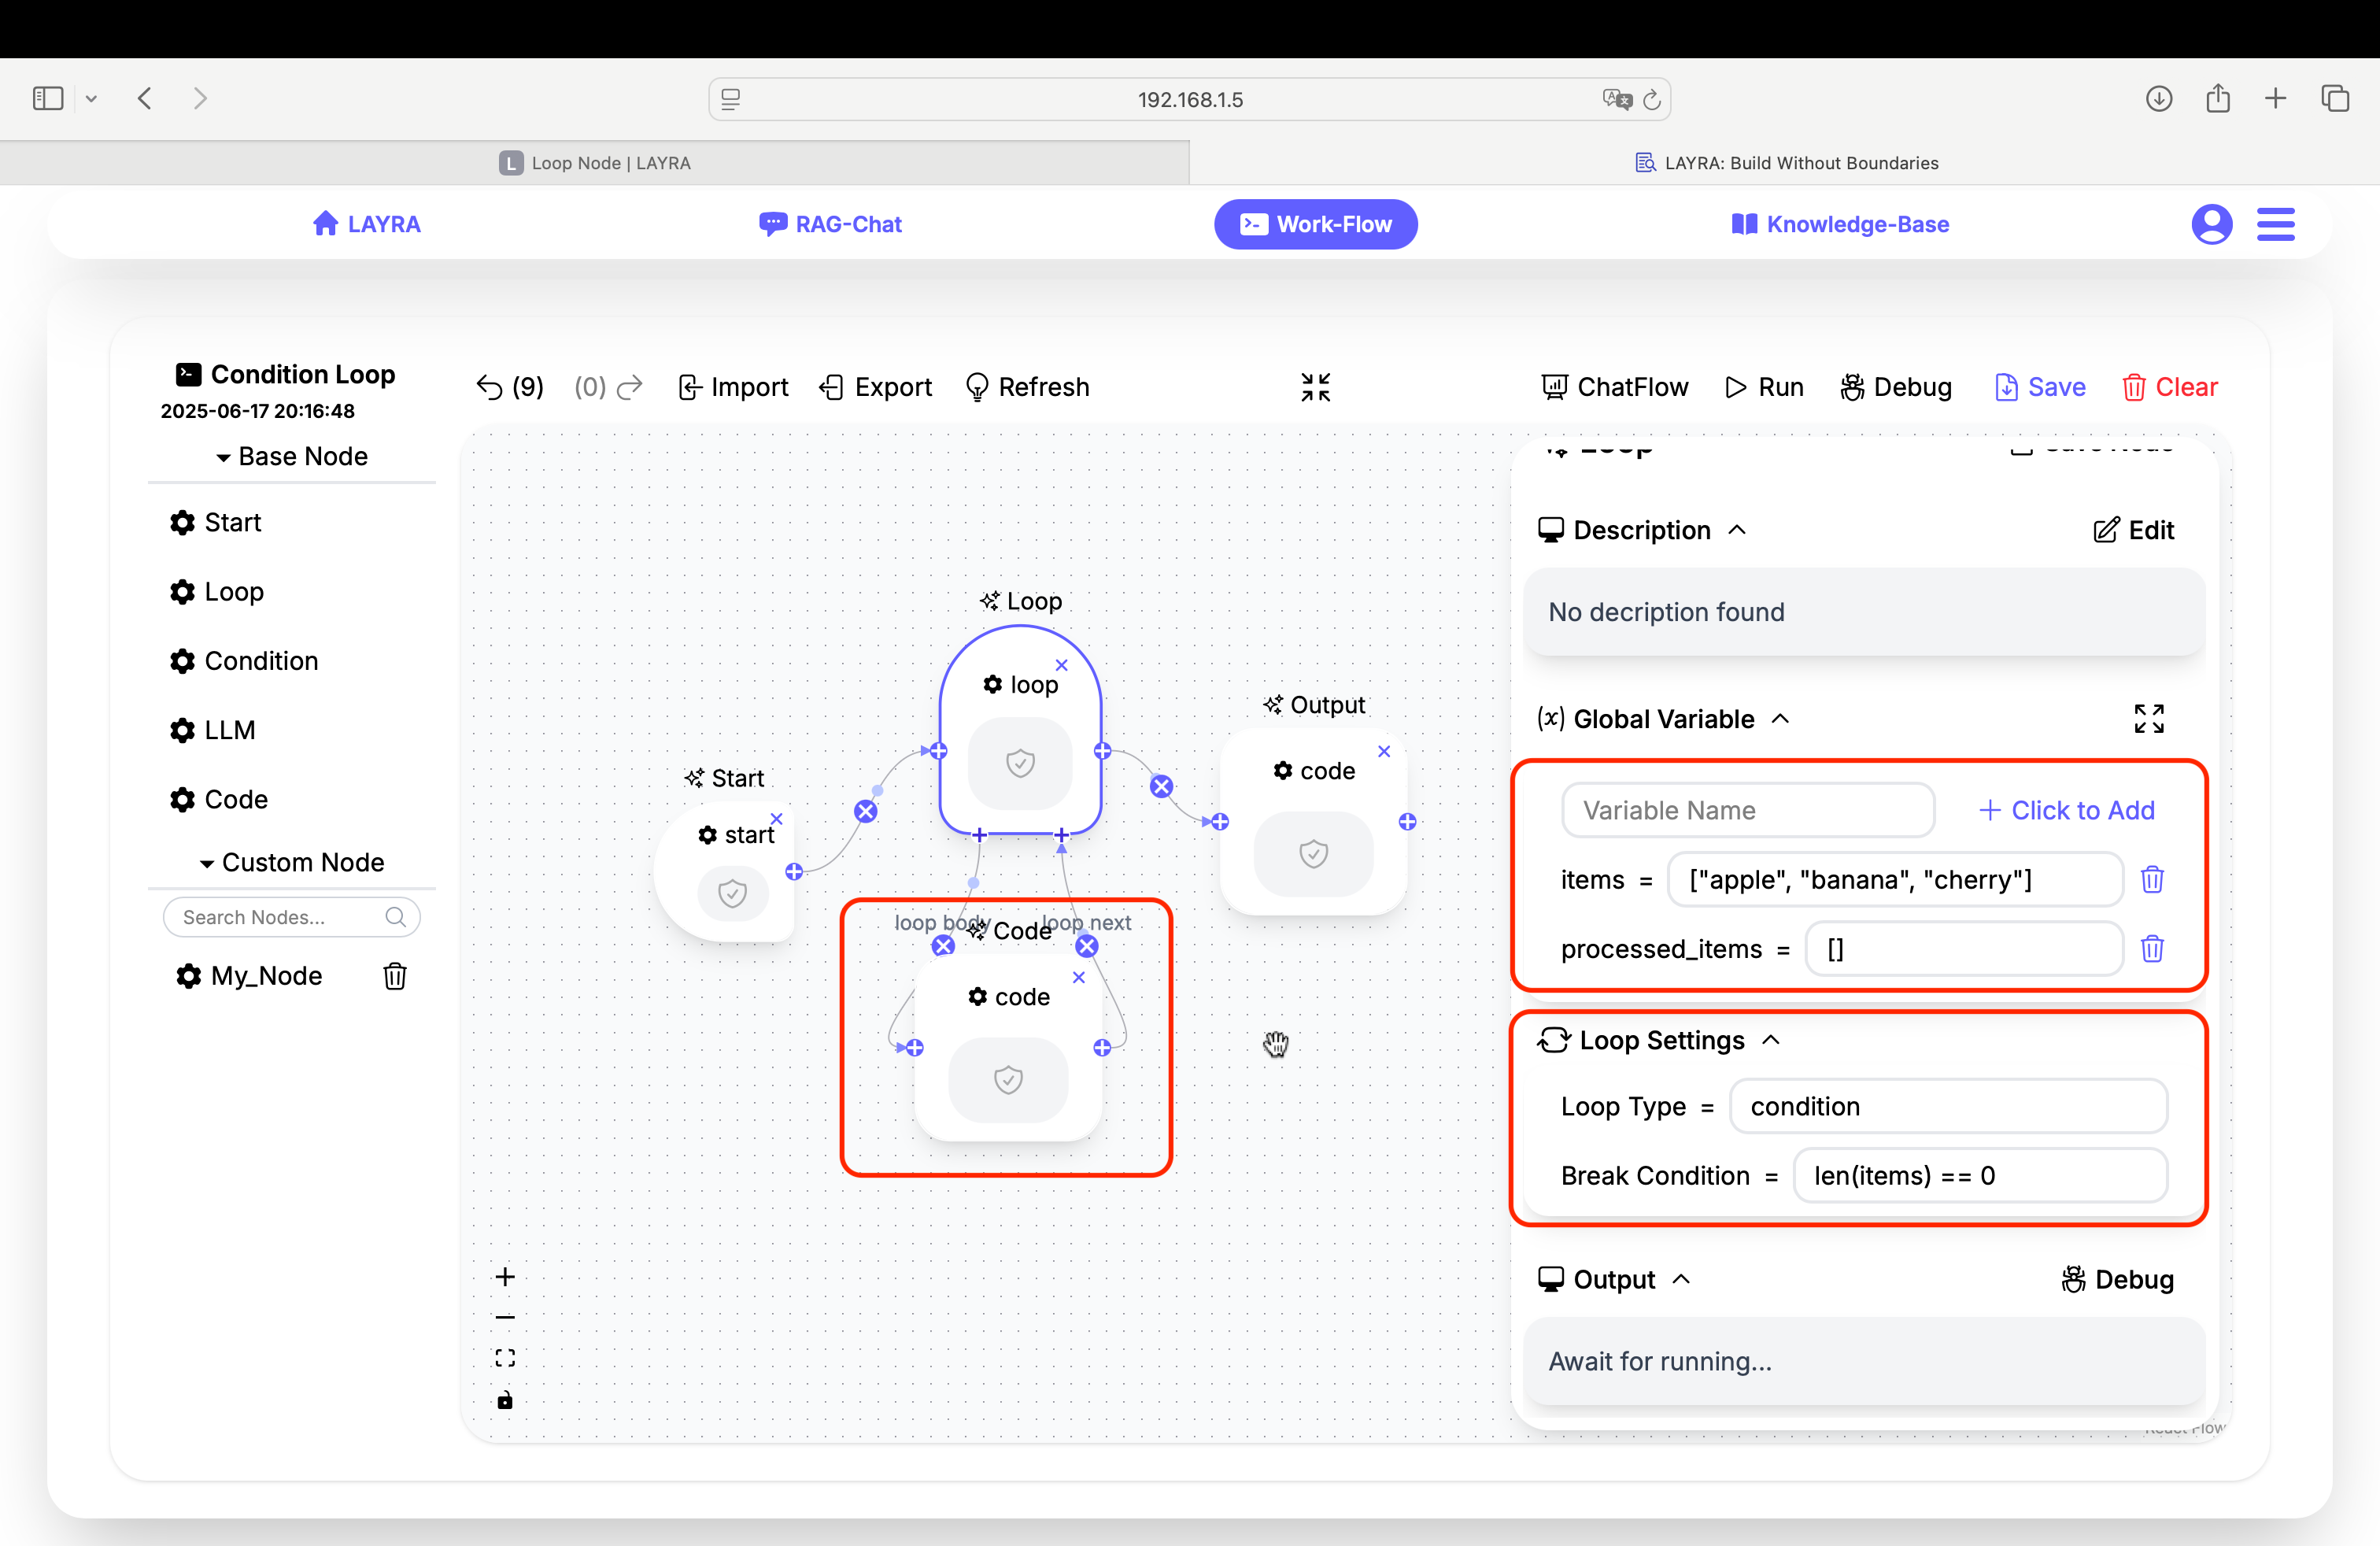
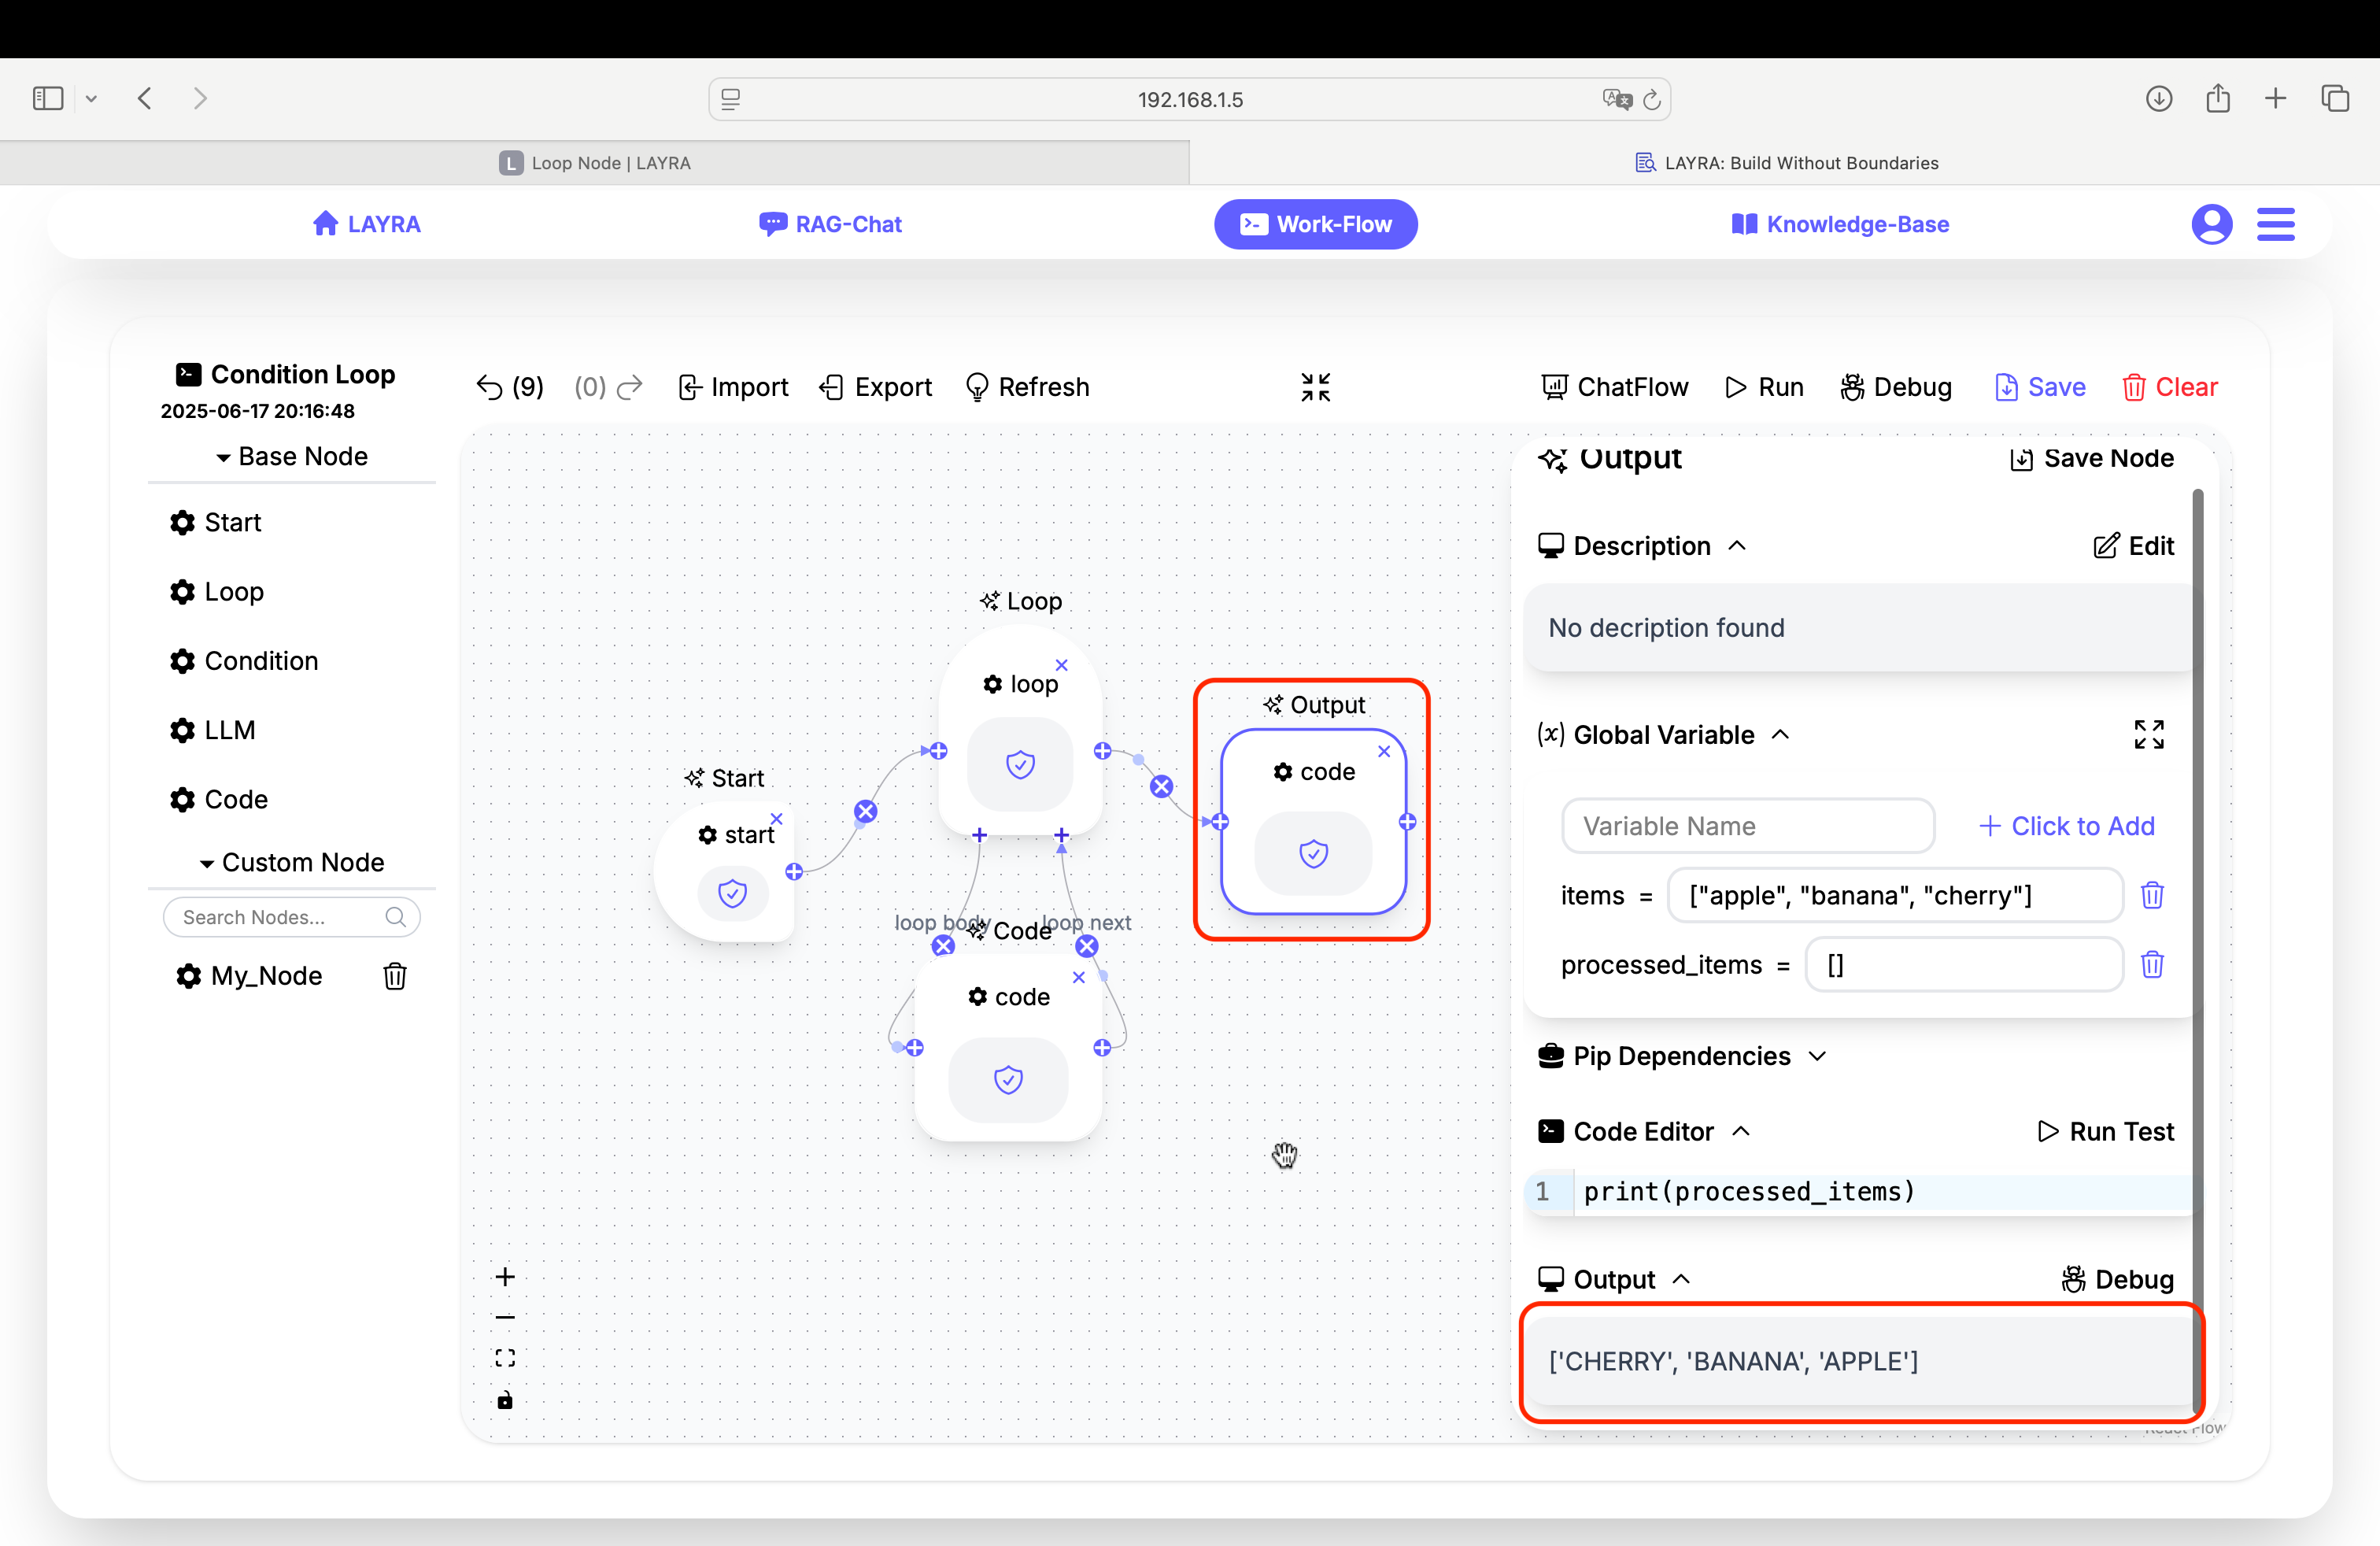
Practical Example: Processing Items
We'll create a workflow that processes elements in a list. This simple example converts all string elements in a list to uppercase. The method involves sequentially retrieving items from the original list using pop(), converting them to uppercase, and appending them to a new list:
-
Initialize global variables:
items = ["apple", "banana", "cherry"]
processed_items = [] -
Configure Loop Node:
- Loop Type: Condition
- Break Condition:
len(items) == 0
-
Loop body (Code Node):
# Retrieve current item
current_item = items.pop()

# Process item (convert to uppercase)
processed_items.append(current_item.upper()) -
Post-loop processing (Code Node):
# Output results
print(processed_items)
# Output: ['APPLE', 'BANANA', 'CHERRY']
Pedagogical Note: While this could be achieved with a one-liner like
[x.upper() for x in items], this example intentionally demonstrates fundamental workflow concepts. The simplicity allows focus on core mechanics, which can be extended to complex real-world scenarios.
Advanced Features
Multi-Level Nested Loops
Loop nodes support deep nesting hierarchies, enabling complex multi-layered structures similar to programming languages:
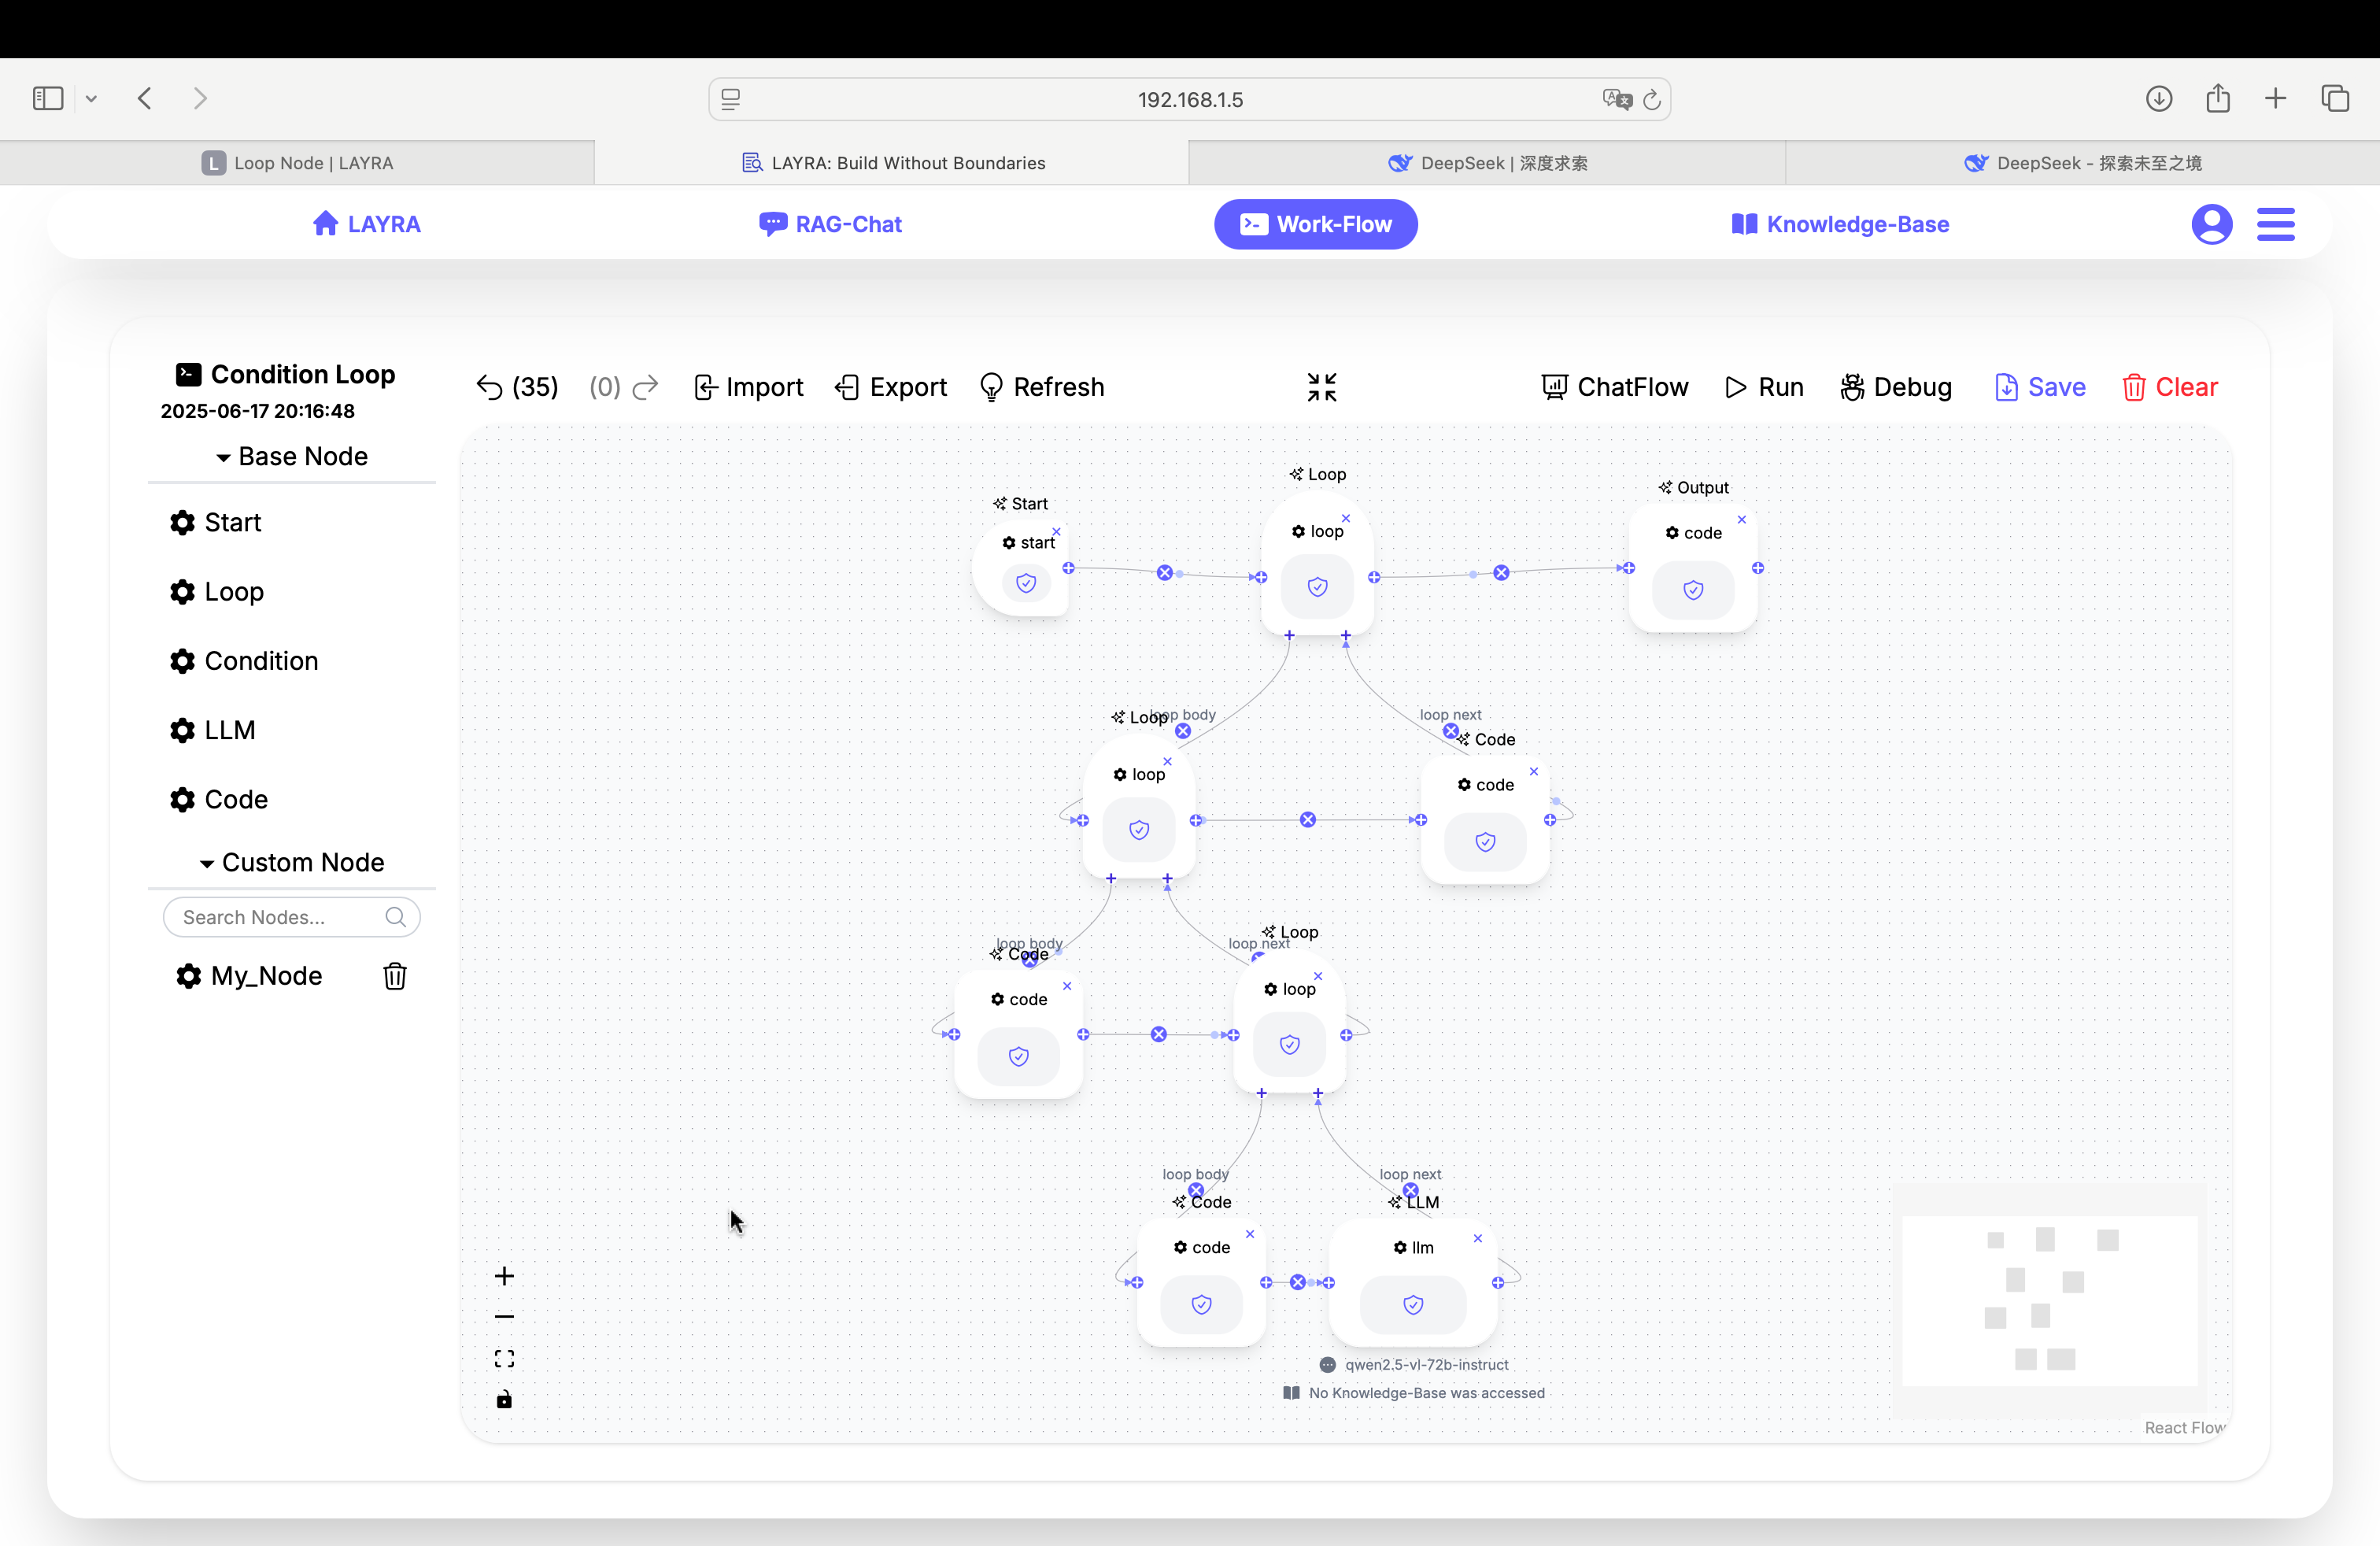
Note: Supports unlimited nesting levels for intricate workflows
Dynamic Loop Control
Control loop execution dynamically using Python expressions:
# Break condition
error_detected or iteration_count > max_retries

# Continue condition
response['has_more'] and processed_items < 100
- Set breakpoints in nested child nodes
- Constrain maximum iterations during testing
- Validate exit conditions at each nesting level
Next Steps
Now that you understand looping, explore combining Loop Nodes with Code Node for complex flow control