Workflow Operations
This final chapter covers fundamental workflow operations and critical usage considerations.
Core Operations
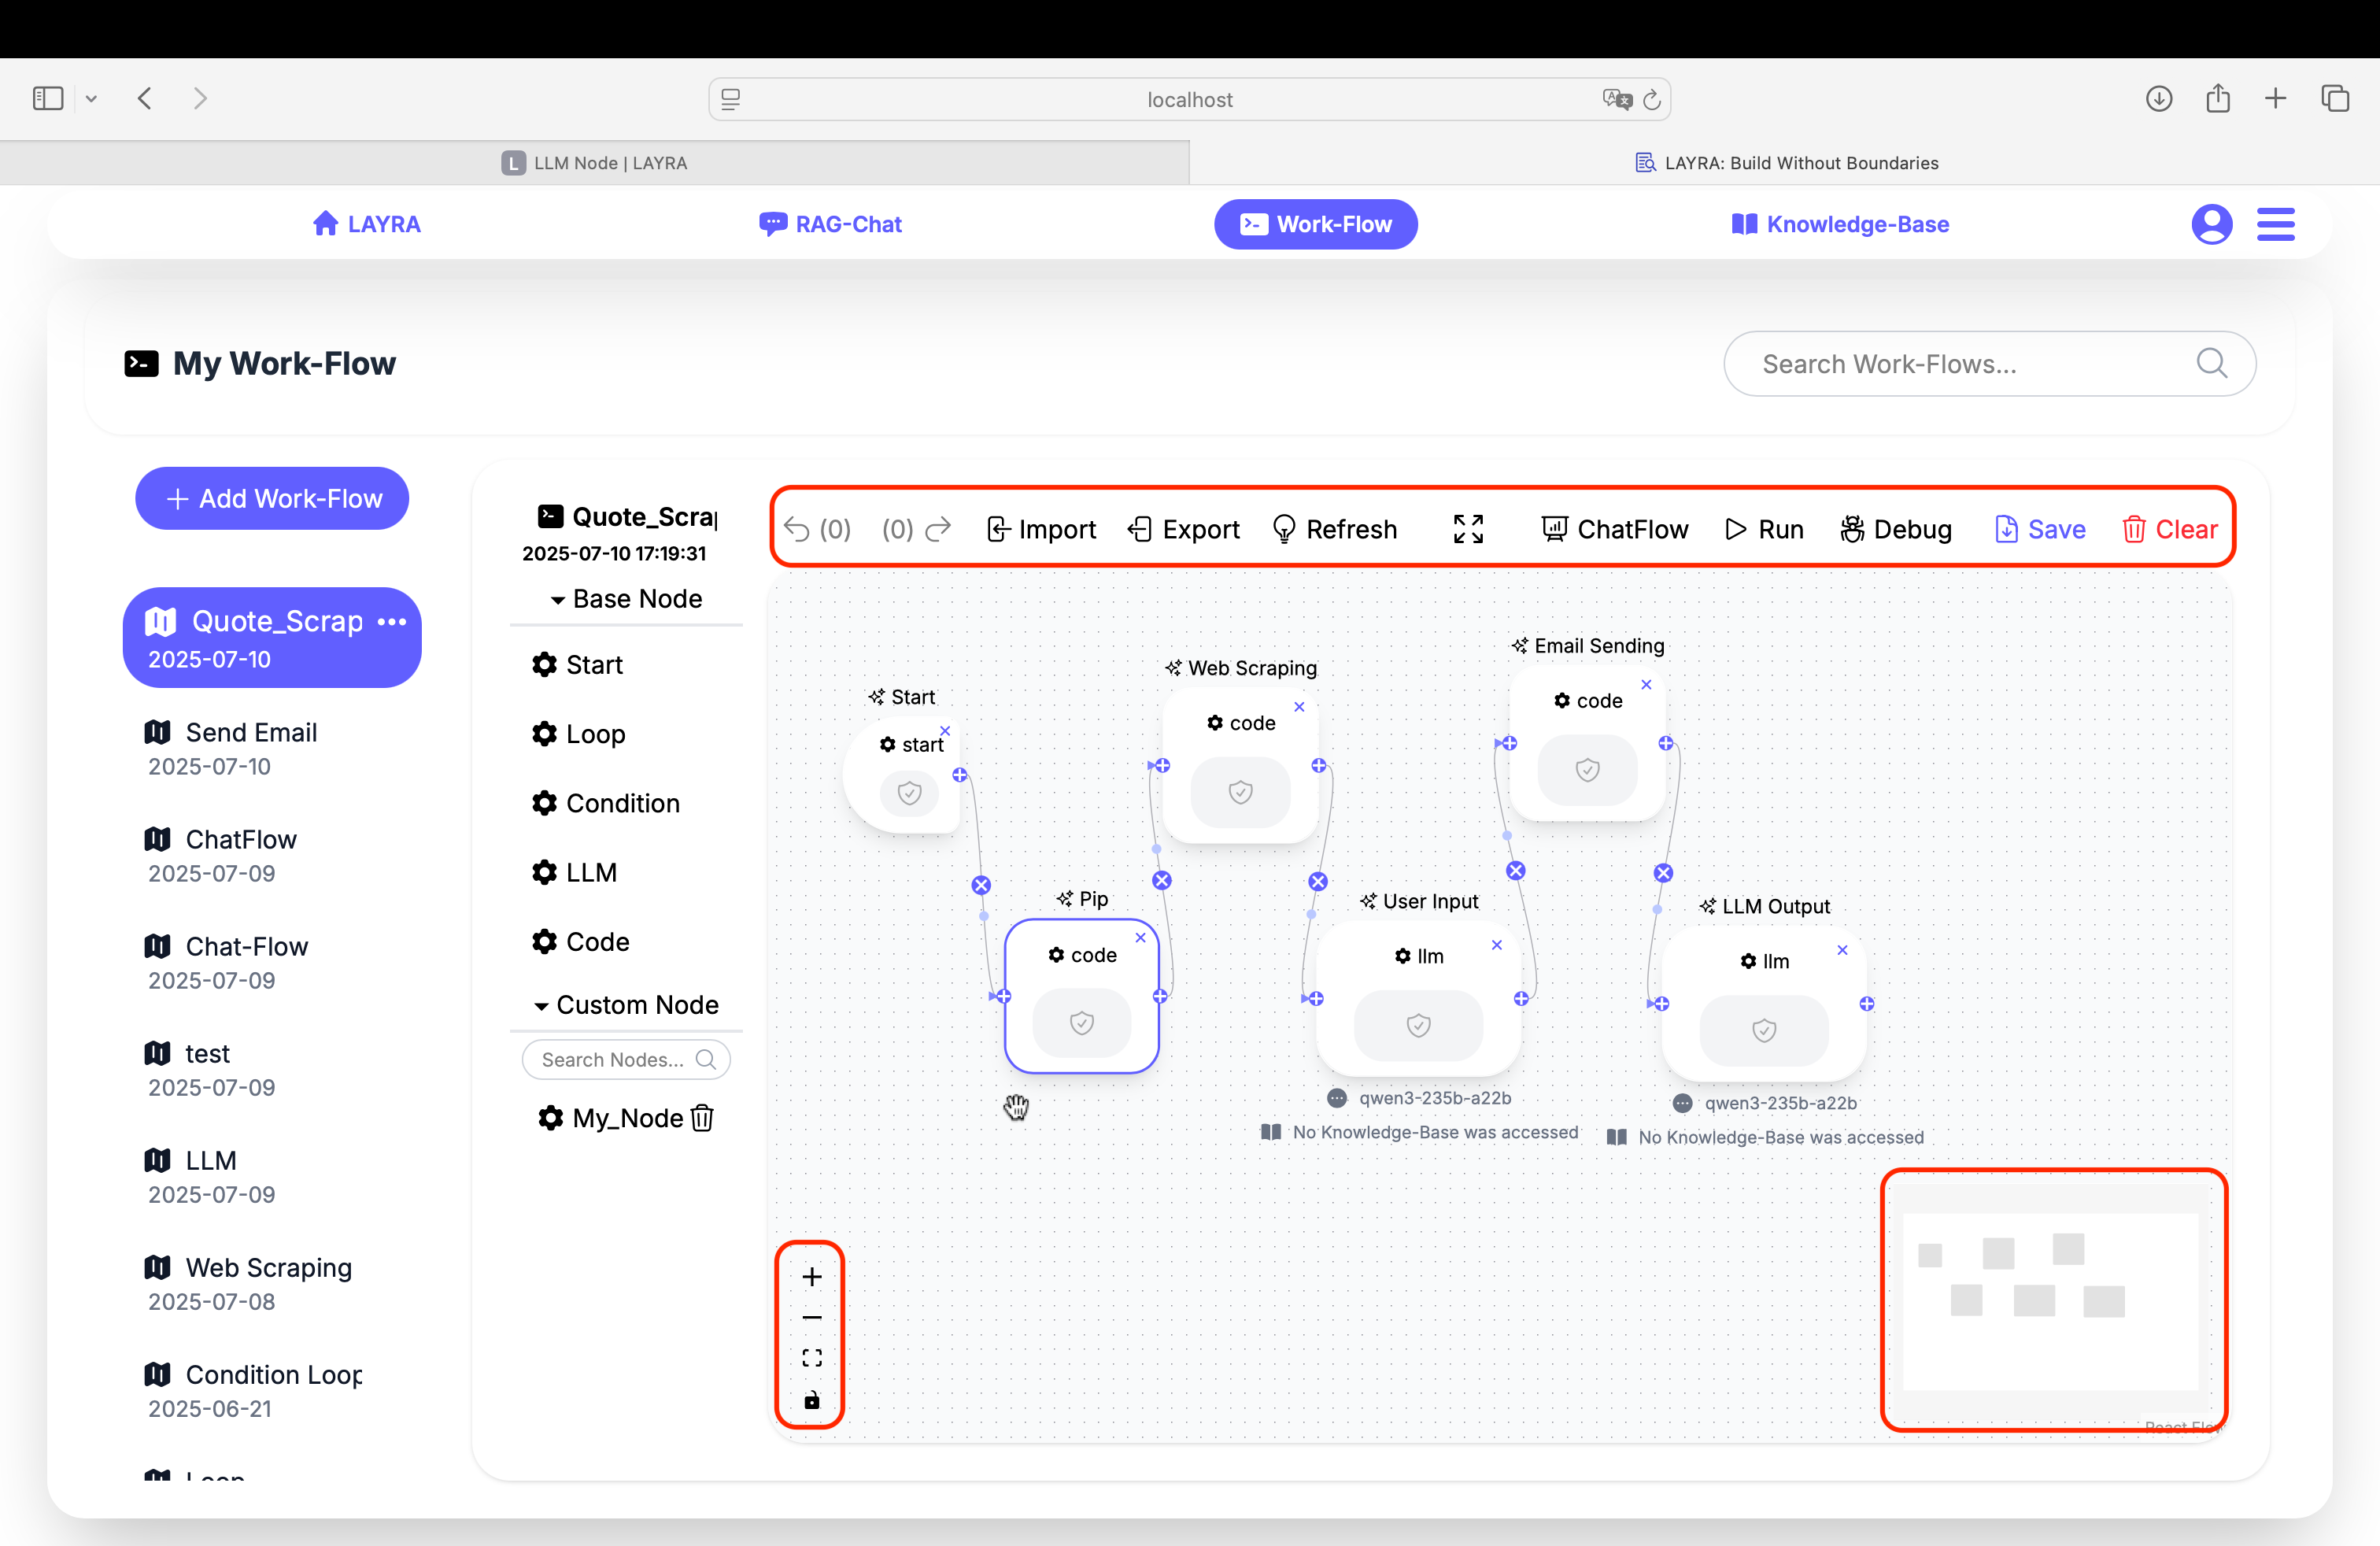
The workflow canvas features essential controls organized into distinct functional areas:
Top Toolbar Functions
Left to right:
- Undo: Reverts the last canvas action
- Redo: Restores the last undone operation
- Import: Loads workflows from external
.jsonfiles - Export: Saves current workflow to
.jsonformat
⚠️ Excludes sensitive credentials (e.g., LLM API keys) - Refresh: Reloads canvas
⚡ resets workflow to pre-execution state without interrupting execution - Fullscreen: Toggles full-screen display
- Chatflow: Shows/Hides the Chatflow panel
- Run: Executes the current workflow
- Debug: Runs workflow in debug mode
- Save: Persists workflow modifications to storage
- Clear: Resets canvas (removes all nodes)
⏹️ During execution, this becomes a Stop button to terminate workflow after current node completion.
• Undo/Redo history clears upon page refresh or navigation
• While auto-save functions periodically, manual saving is recommended
• Nodes default to 1-hour timeout
• Stop only interrupts after current node completion
• Always test workflows before execution to prevent infinite loops
Canvas Navigation Controls
Bottom-left:
- Zoom In: Enlarges view (+)
- Zoom Out: Reduces view (-)
- Reset View: Restores default zoom + centers workflow
- Lock Toggle:
🔓 Unlocked: Enables individual node movement
🔒 Locked: Moves entire workflow during drag
Bottom-right:
- Minimap: Workflow overview with viewport indicator
Debug Mode
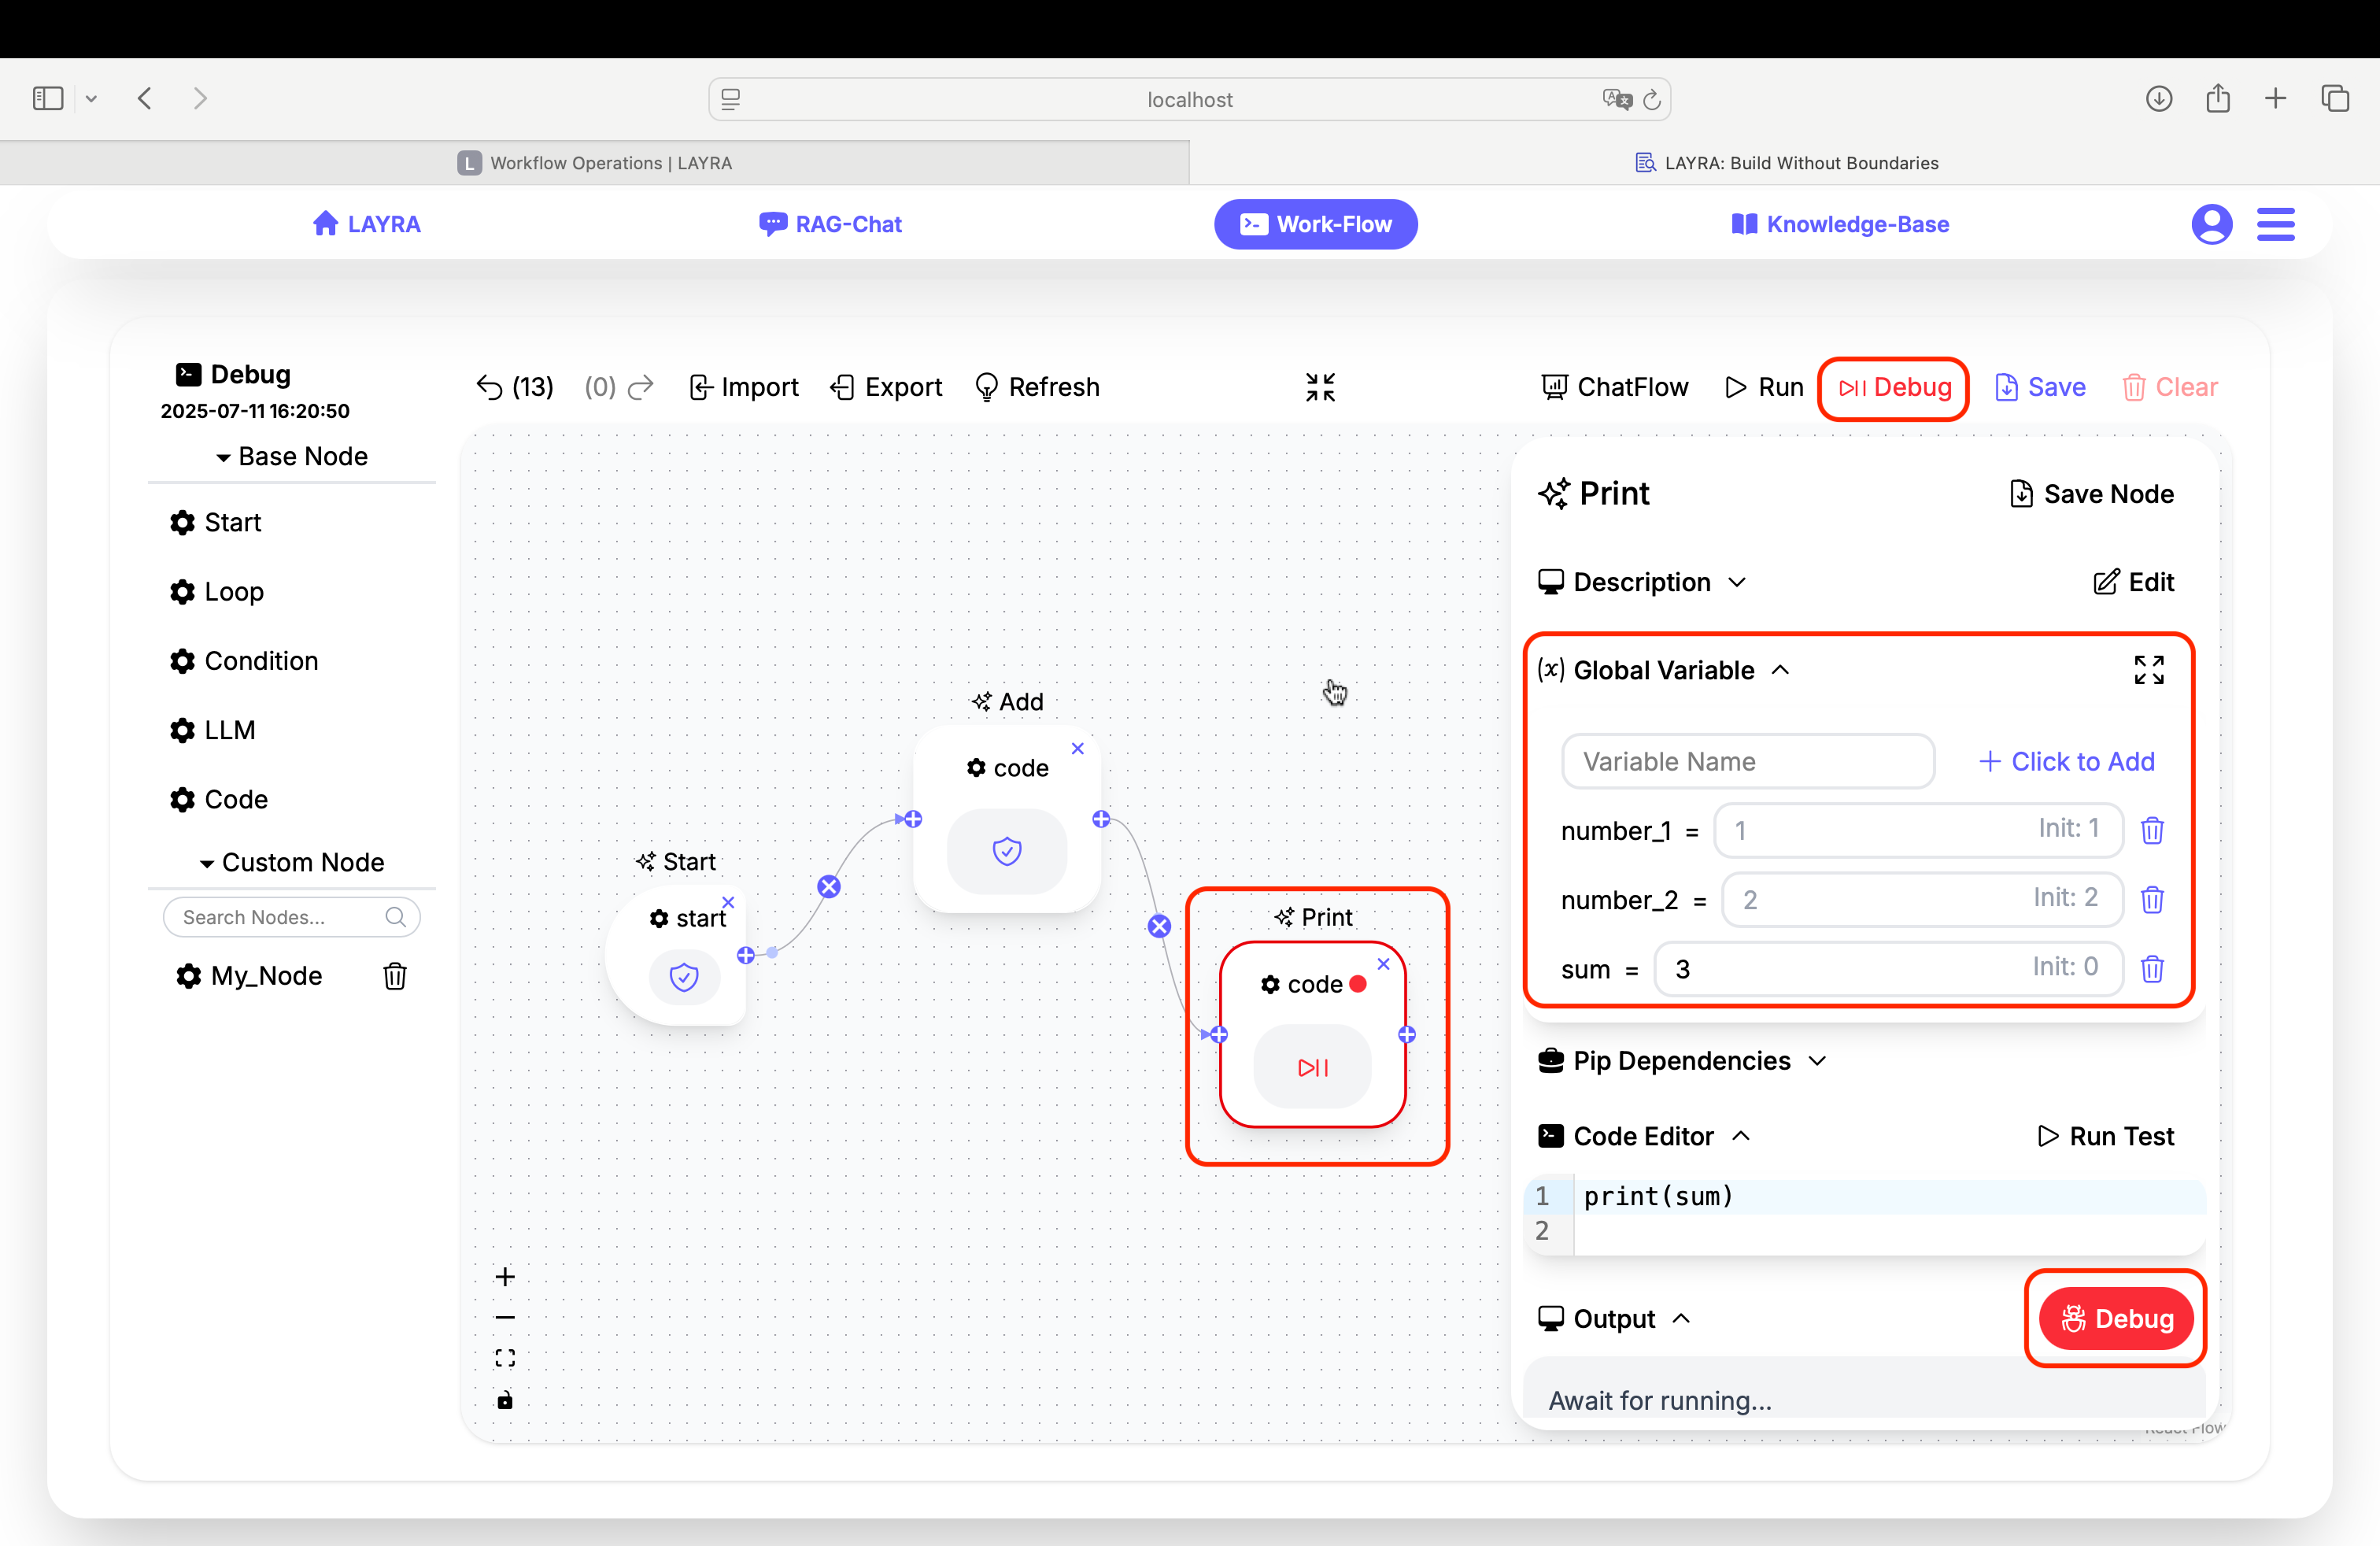
Debug mode functions similarly to code compilers. You can temporarily pause workflow execution using breakpoints to inspect variable values and compare them against initial states.
Key Features:
- Breakpoint Setup
- Available on all nodes except Start node
- Click
Debugbutton in node config's Output section - Active breakpoints show 🔴 icon next to node name
Debug Walkthrough
Consider a workflow with two Code nodes managing three variables:
number_1, number_2, and sum
Node 1: Executes sum = number_1 + number_2
Node 2: Prints sum value
Debug Process:
- Set breakpoint on Node 2
- Run debug mode
- Observe Global Variables:
- Current values:
number_1=1,number_2=2,sum=3 - Initial values:
1,2,0
- Current values:
- Continue execution → Node 2 prints
3 - Advanced: Force-change
sumto4during debug → Final output becomes4
Next Steps
You've now mastered LAYRA workflow fundamentals! Proceed to:
- Explore official templates in Template Gallery
- Design custom workflows for your specific needs
- Discover advanced features beyond this tutorial
Build without boundaries - Your LAYRA journey starts now!
- China users: Scan QR code below to join WeChat support group
- Global users: Contact author directly at liweixmu@foxmail.com
"Thank you for choosing LAYRA to accelerate your AI application development. We applaud your commitment to exploring cutting-edge AI technology and wish you every success in your work."
Wei Li, Founder, LAYRA Project